Creating a Dropdown Menu with Fireworks CS3
Developed by Joe Story
Dropdown menus are a very popular item in many websites. They have become popular because web designers can add a lot of links and organize them in proximity to each other while taking up less space and eliminating clutter on the page. In this tutorial you will learn how to create a dropdown menu in Fireworks and export it to a table cell in Dreamweaver. This is a step-by-step tutorial is intended to teach you some basics about web design, Fireworks, and Dreamweaver in the process. Click HERE for a dropdown menu example Click HERE for a Microsoft Word version of this tutorial **Click on any of the images for a full size version of the image |
Step One: Open Fireworks |
|
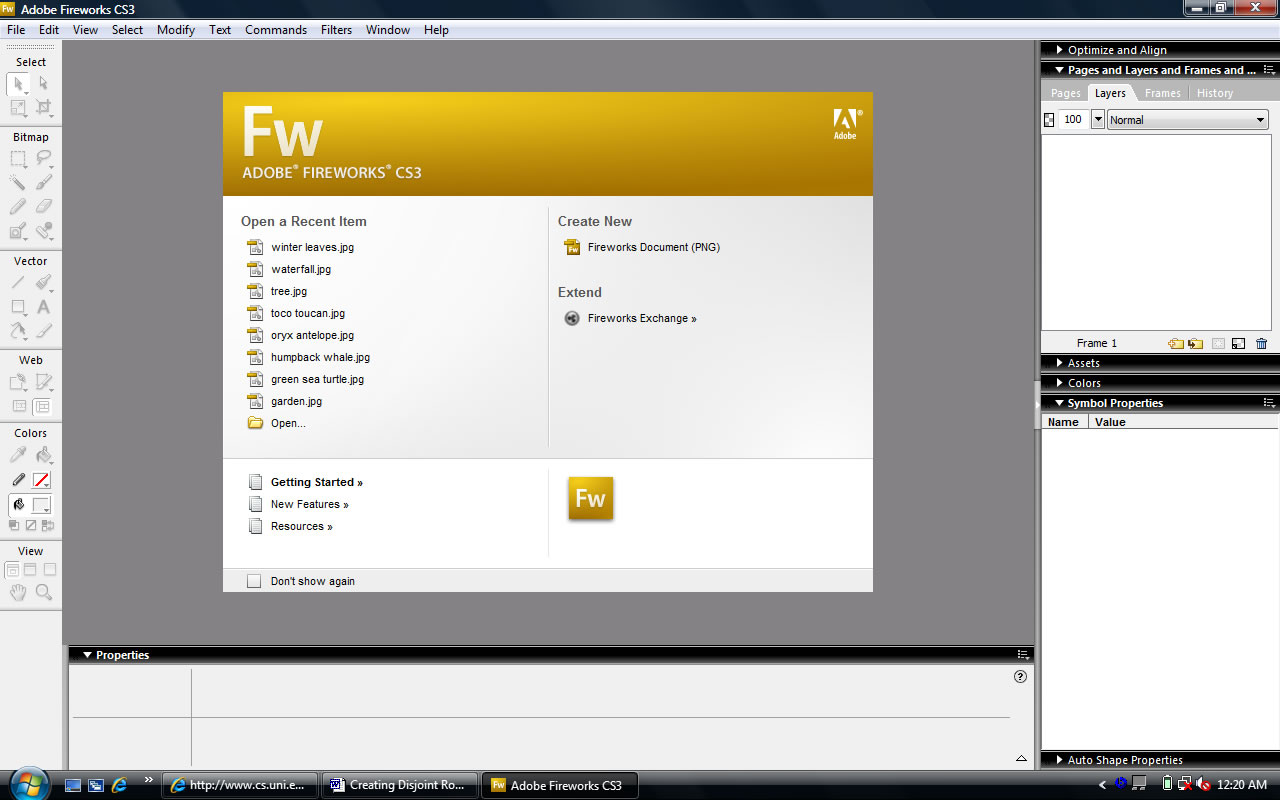
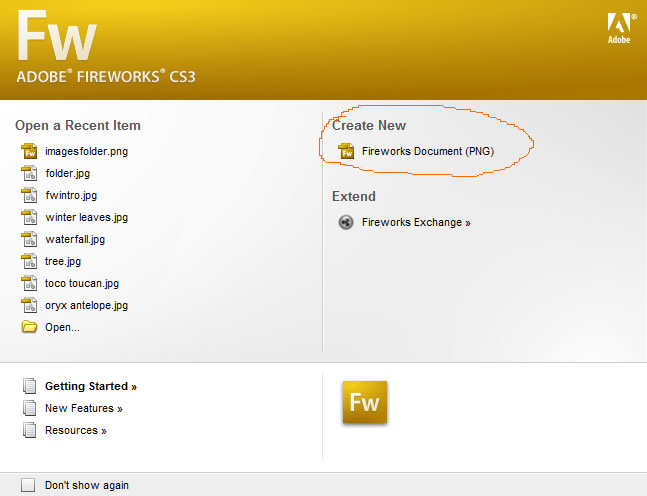
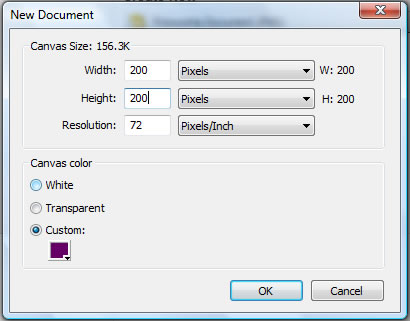
The first thing we will do is open Fireworks. This can be found in the Start menu under Adobe Software. Once Fireworks is open we will create a new Fireworks PNG Document. Once this is open we get a window asking us what we want in our new document. We need to tell Fireworks three things:
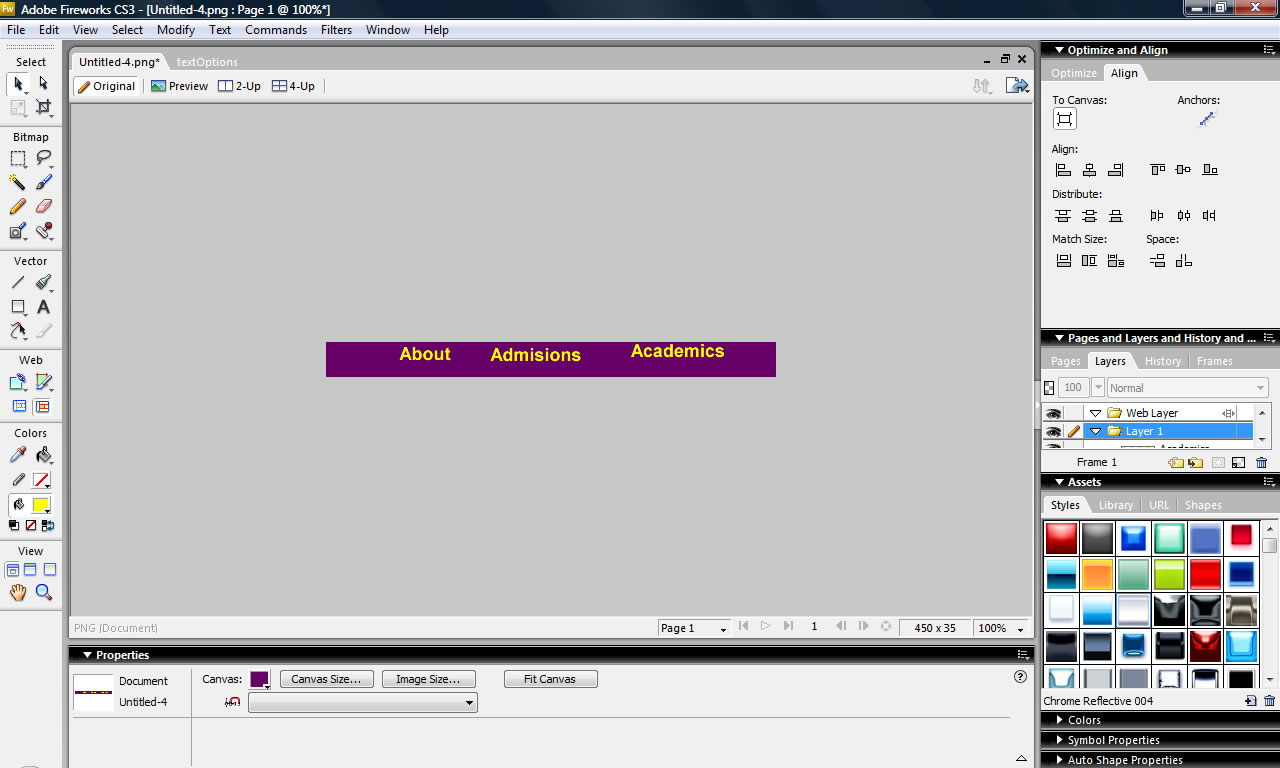
These things all depend on where we are putting the file. Be sure that the size is correct for where you are placing it (i.e. how big is the table you want to export it into). Resolution is usually fine at the default of 72. As far as color goes, make sure it matches your webpage. I choose a canvas size of 450 pixels x 35 pixels with a purple background. I chose this because this is the size of the table cell I will be exporting the document into.
|
Fireworks Welcome Screen
Create a New Fireworks PNG Document
Document Size
|
Step Two: Create Headings |
|
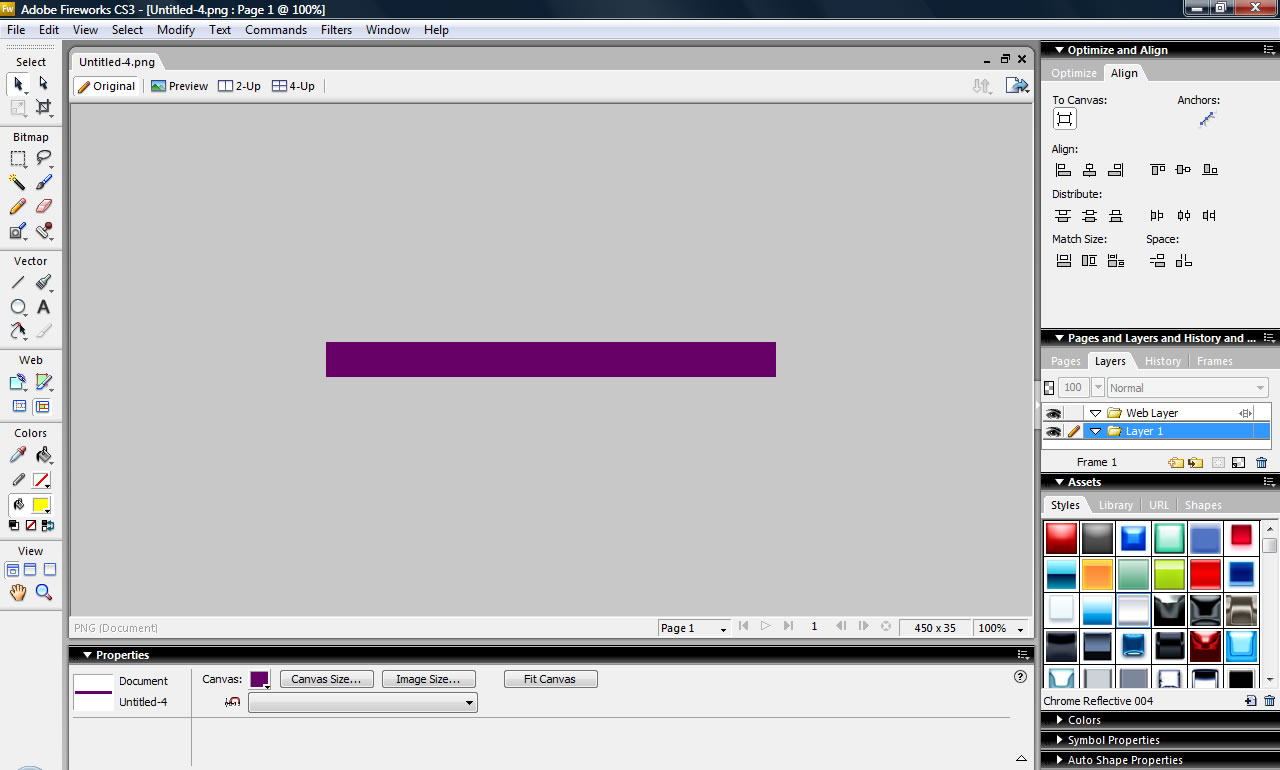
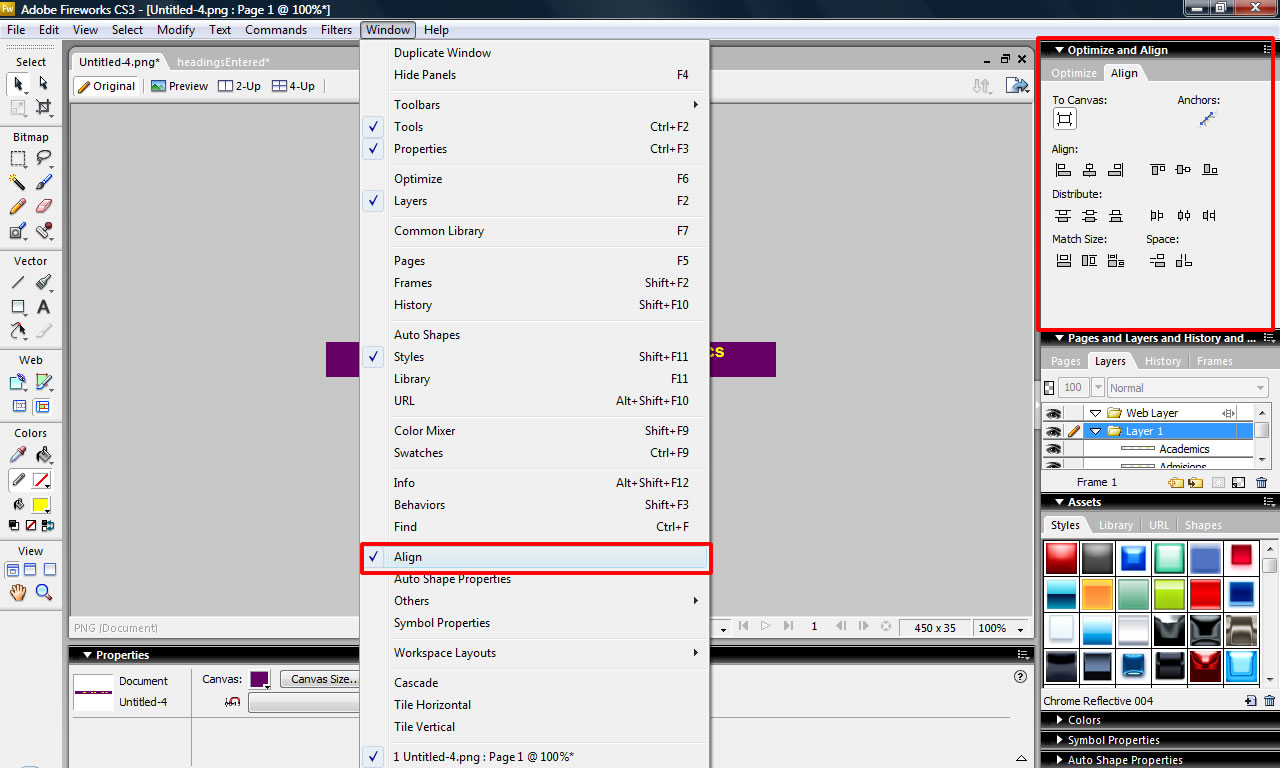
When you set the sizes Fireworks opens up a blank canvas for you to work with. We now need to decide what to add for headings for our dropdown menus. Since I want to make something simple and helpful for people new to UNI, I will choose About, Admissions, and Academics as my headings. When you are making the headings for your webpage and having problems deciding what to put for headings a good trick is to sit down and write down all of the links or pages you want to add to your site. Once you do this group them in relationship to each other trying to find some common ground. After this is done you can give the groups broad headings. This ensures proximity with your links and the user won’t be rolling through your menus looking for items. Go to the right and select the Text Tool. The Text Tool is the big A found under the vector graphics section. You will notice that the property inspector changes once this has been selected. We can change text properties here. When choosing your text properties good typography principles should be followed when you make your decisions. I’m choosing Arial, yellow, size 18, and bolded. Once this is done click anywhere on the canvas. You will see a cursor appear. Type “About”. Once you type this double-click somewhere on the canvas. Another cursor appears. Type “Admissions”. Do this one more time and type “Academics”. Now we will align the headings. Open the Align Panel. This is on the right of the window. If you don’t see this go to the windows menu at the top and select align. Select to canvas. This will align everything to the canvas. Select all three items (Click on each one with the shift key held down) and click align to vertical center. Align to vertical center will be the fifth button on the top row. Now select the “Admissions” heading and center align it to the horizontal center. This will be the second button on the top row. You can eyeball align the other two off from it a ways making sure they are about equal distance away from the edges of the canvas.
|
Blank Canvas
Text Properties Chosen
Headings Entered on Canvas
Align Panel
|
Step Three: Create Hotspots and Assign Links |
|
Now we can create some hotspots. Hotspots are areas the user can click on. Click on the Hotspot Tool. Draw a separate rectangle around all three headings. Each of these blue rectangles is a Hotspot. When we put them on the web anytime the user rolls over the area covered by the rectangle it will be an active link. We now assign links and alt tags to these hotspots. When click on one of the hotspots you will notice the Property Inspector change. We can add a link and an alt tag. The link is the destination you would like the user to go to if they click the hotspot. The alt tag is user accessibility options for disabled users. It is important to add this. Many web designers foolishly will forget this step. Go to the UNI Admissions department website and copy and paste the link from your web browser into the link box. When you are done type “About UNI” in the alt box. The third box that says target on it you can leave blank. What this does is give you options on where you would like the page to open up at (i.e. in the same window or a new one sort of thing). |
Hotspots Drawn
Completed Link and Alt Tag
|

Step Four: Adding Cell Text |
|
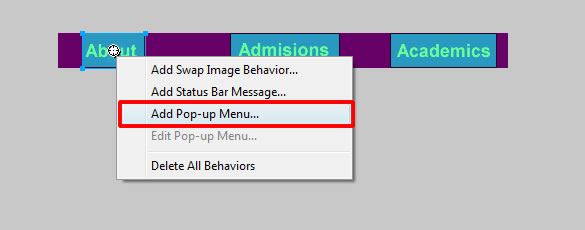
Now we can add a menu to our headings. With your selection tool click on the About hotspot. You will notice a small white circle appear. This is called the Behavior Handle. Click on it and a menu appears. We can assign actions with this menu. Scroll down and choose the third option called “Add Pop-up Menu”. A window will appear. This is a wizard that you use to create and edit your dropdown menu. This wizard has four steps:
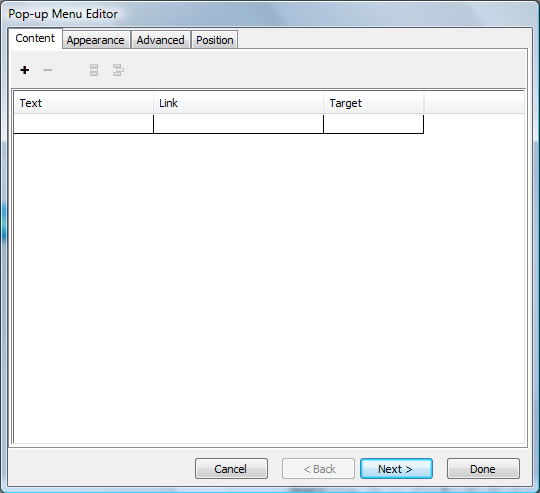
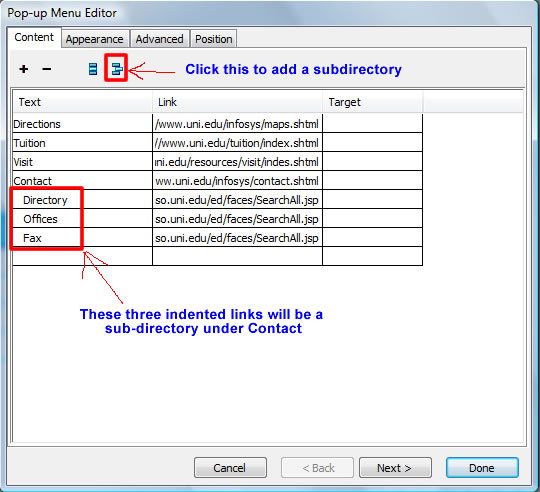
In this first part we will add what we want to include about UNI. Let’s add Directions, Tuition, Visit, and Contact. We add these to the Text Column. This column shows the actual text of our menu. Type in your information and click enter after each one. Each cell displays its own text. Whenever you add items into a dropdown menu it is always a good idea to add the more important and most commonly requested items at the top of the list. Now that you have this done add a submenu under Contact. How we will do this is type Directory Now click on it and highlight it. Go to the top and click the “Indent Menu” command. This will indent Directory. Now click enter and type Offices and Fax. Everything you type in will be a subdirectory of Contact. When you get ready to leave the subdirectory and create more main menu items under Contact just click outdent. The next thing we will do is complete the link column. The user will not see this column, but will get mad if the links don’t work! For this we will copy and paste in the relative URL’s. Click Next when you are finished |
Add Popup Menu
Popup Menu Editor Wizard
Added Content with URL’s
|
Step Five: Adding Some Flare to the Cells |
|
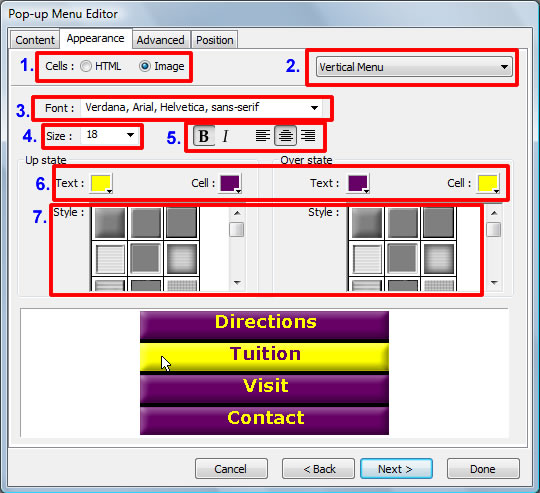
In this part we will edit the appearance of the cells. This is a seven step process. Don’t be scared by the picture though, it’s really easy! Just go through the steps.
Don’t be afraid to play and try different combinations. You wont mess anything up so have some fun. Click Next when you have finished. |
The Seven Steps of Appearance Editing
|
Step Six: Editing Advanced Options |
|
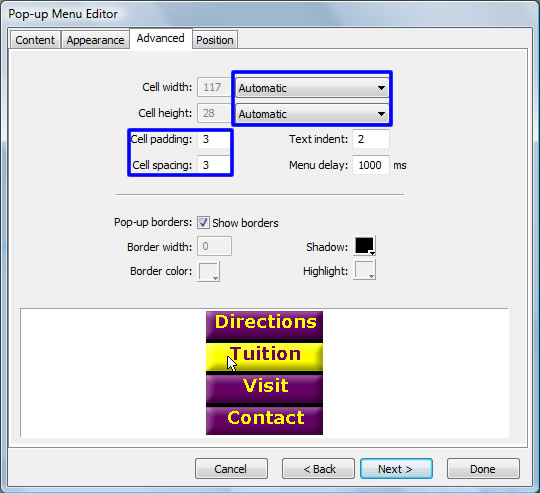
In this step we can assign specifics to our cells such as height, width, padding, spacing, and border properties. If you are familiar with HTML table editing this will be second nature to you. You have two options in regards to cell width:
As far as height goes I always just leave it on automatic. Fireworks sets this on its own in relation to text height. Leave the cell padding and spacing on the default of 3. You can experiment around with this if you like. When you get done click Next |
Advanced Menu Editing
|
Step Seven: Moving the Location |
|
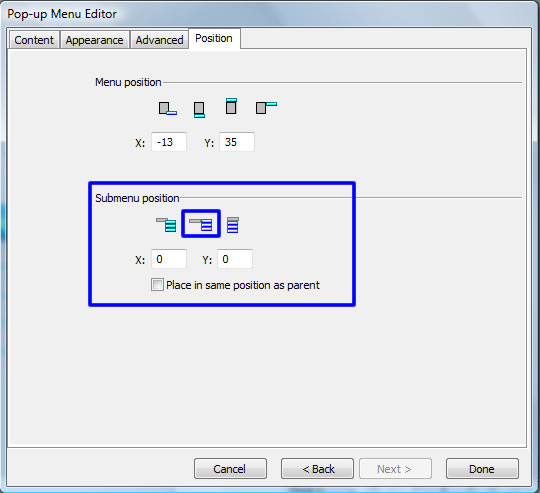
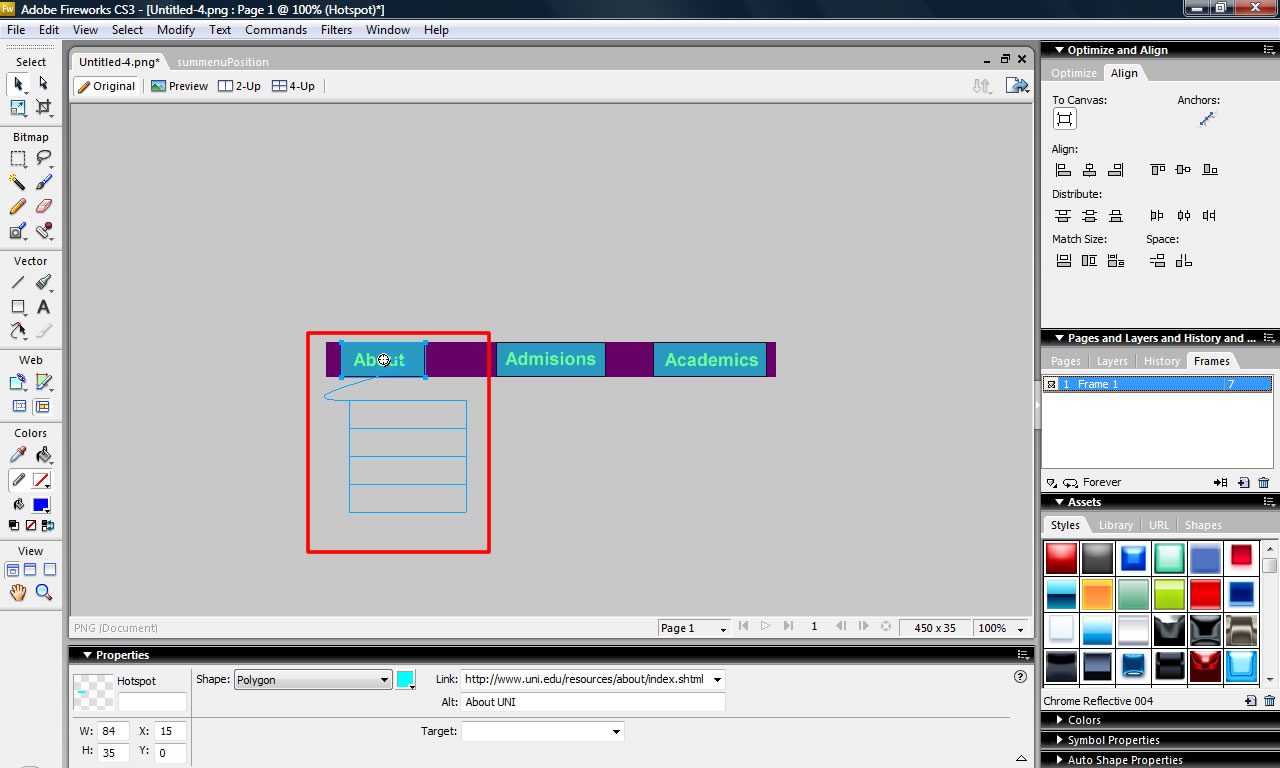
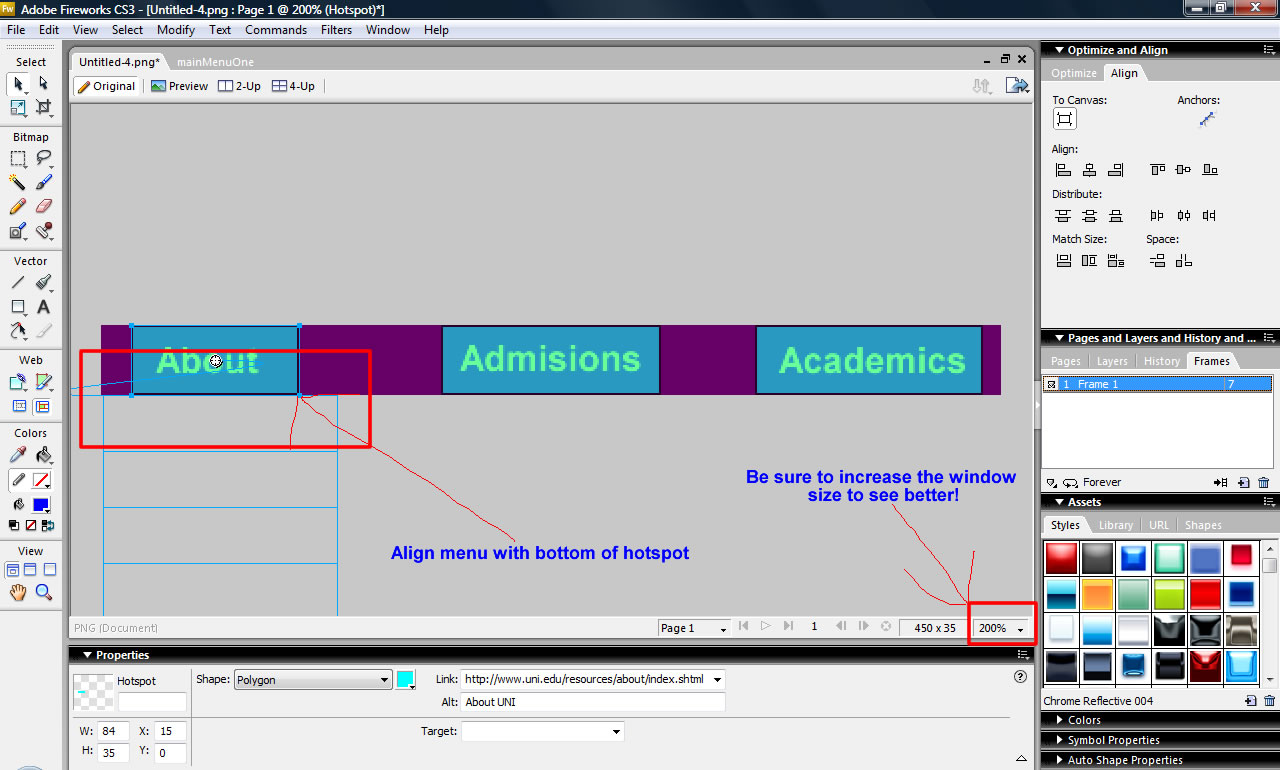
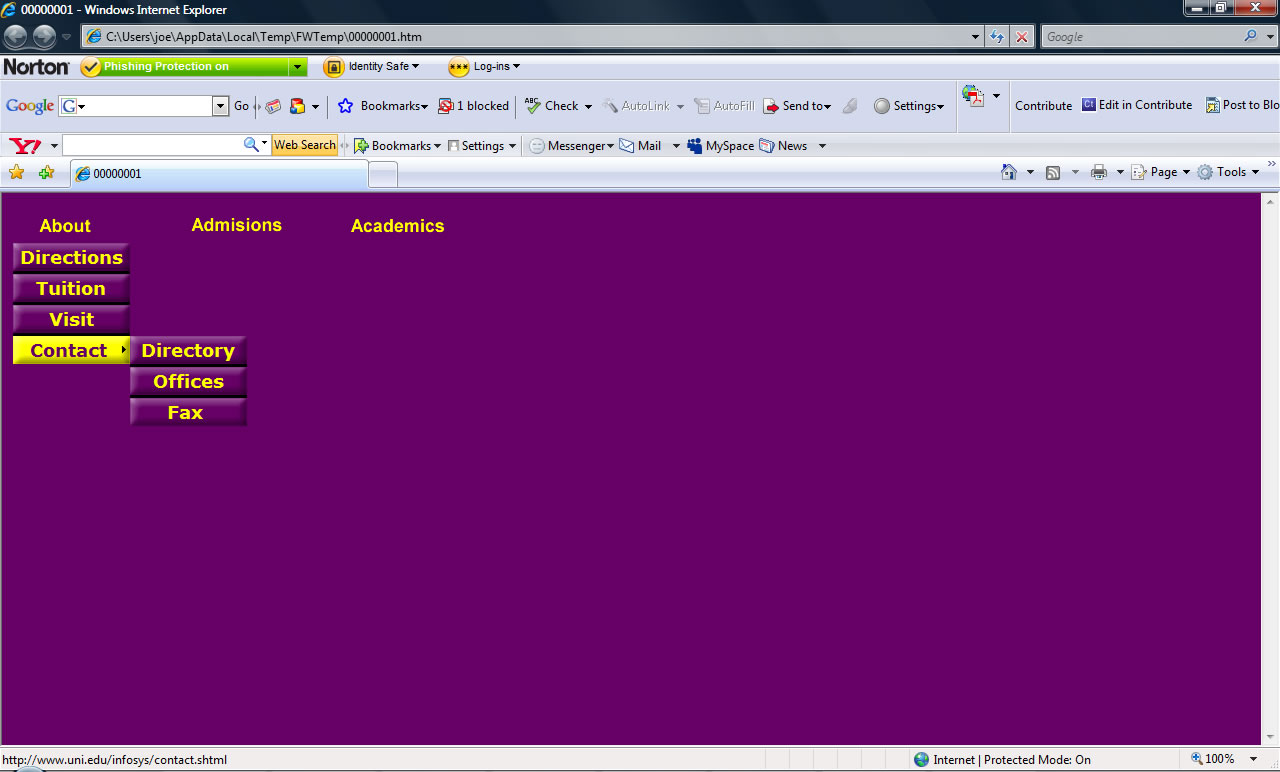
The last step in this wizard is to Set the position of the menu and submenu. We will just set the submenu in the wizard. The main menu we will do manually. To move the submenu go to the submenu section and select the middle option. This will put the submenu directly inline with the parent cell. You will know you have the right selection if the X and Y value are both at 0. Now we will manually set the main menu. Exit the wizard by selecting Done. This takes you right back to the main menu. When you exit the wizard you will notice a blue table on the screen. This is your dropdown menu. If you don’t see this click on the hotspot and it will appear. Zoom into 200% and align it to the bottom of the hotspot trying to center it with the hotspot. Once you get it preview it in your browser to check its placement and test the links. This can be done by File Menu-Preview in Browser, or by clicking F12. You may decide to fine tune or change the settings after seeing it in the browser. Complete steps three through seven for the other two headings on your own as practice. Put in any information you believe would be relevant to admissions or academics. Try writing them out on a piece of paper before adding them.
|
Submenu Align
Main Menu Un-Aligned
Main Menu Aligned
In Browser Preview
|
Step Eight: Export to Dreamweaver |
|
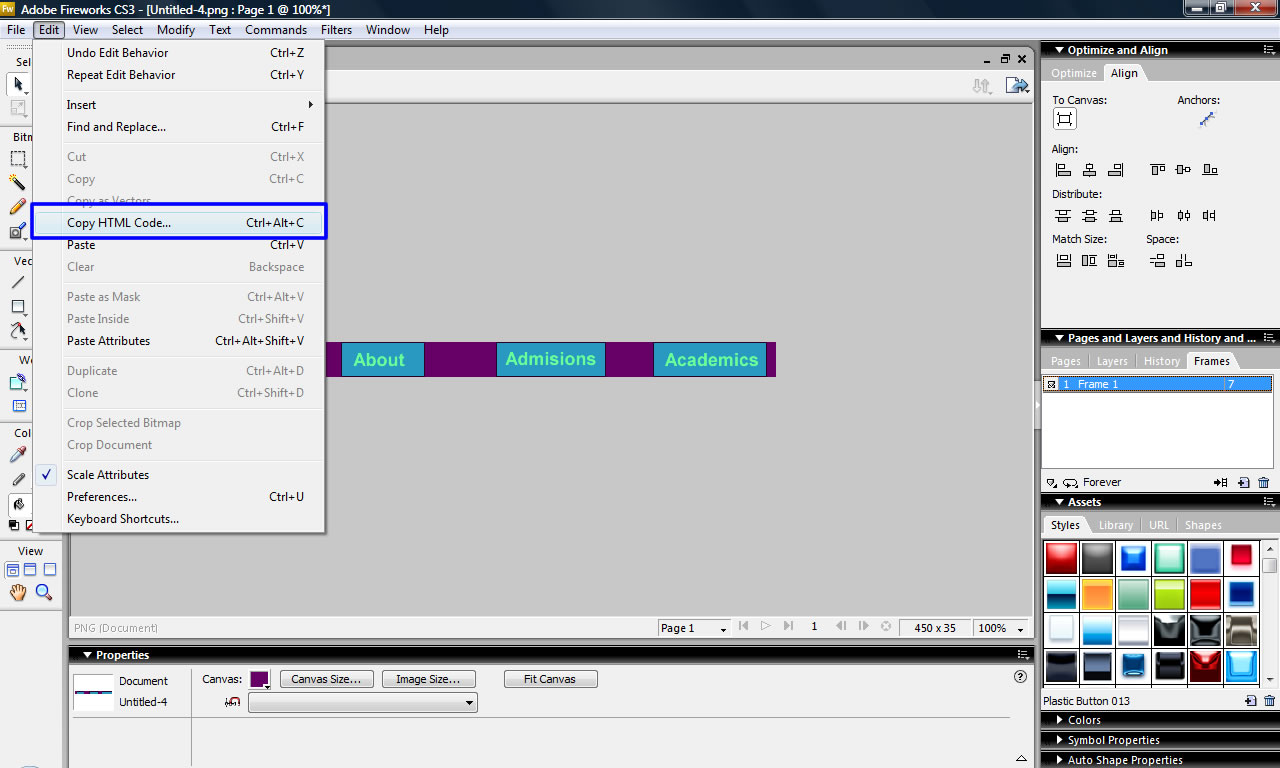
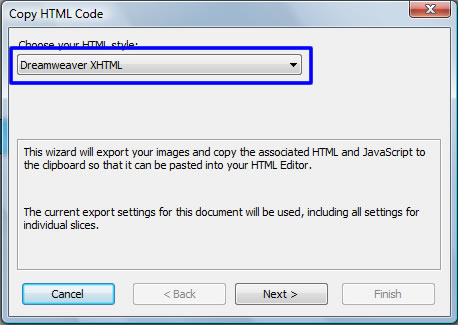
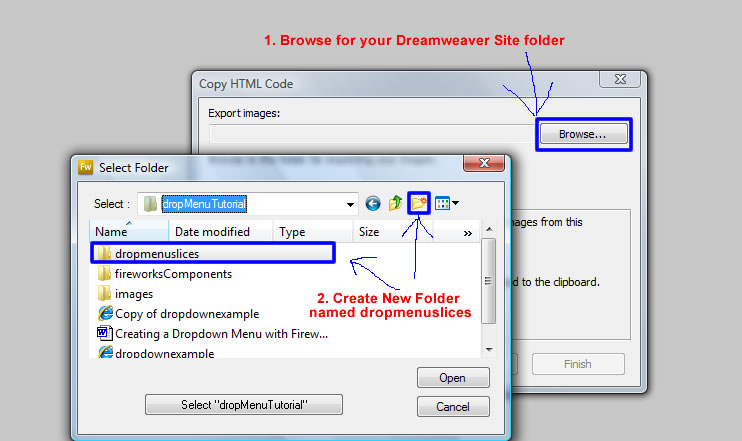
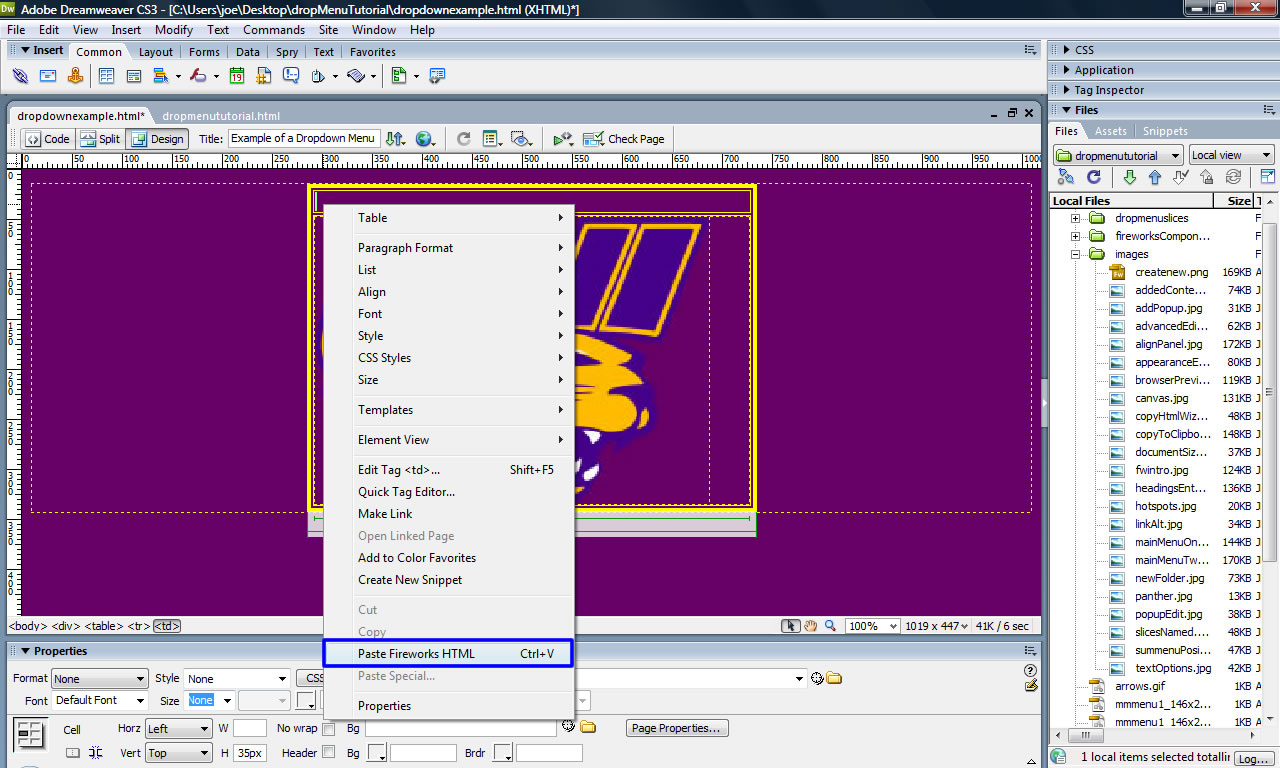
Once you have your dropdown menu completed we can export it to a website. To do this we will copy the HTML onto the clipboard. Go to the Edit Menu and Select Copy HTML Code. This brings up a small wizard. Be sure that XHTML is selected and click Next. From here it asks what you would like to name your slices. Fireworks puts a lot of files into a webpage. We will name these slices “dropmenu” The next step can be a bit confusing. It wants to know where we would like to put our slices. We want to put them in the same folder as our Dreamweaver site is defined in. Browse and find this folder. Once you get to it create a new folder and name it “dropmenuslices”. Click next and then Click Finish. Now go to Dreamweaver. Place your cursor in the cell you want to add the dropmenu into and right click. Go to the bottom and click Paste HTML Code. Save it and preview it to ensure it works. NOTE- Before closing Fireworks be sure to save the file as a Fireworks .PNG file and place it in your Dreamweaver folder so that you can make changes or edit it later. |
Copy HTML to Clipboard
Wizard
Slices
New Folder
Paste HTML into Dreamweaver
|