BEFORE YOU BEGIN,
A. DRAG IMAGE 1, 2, 3, 4 and 5
to your desktop.
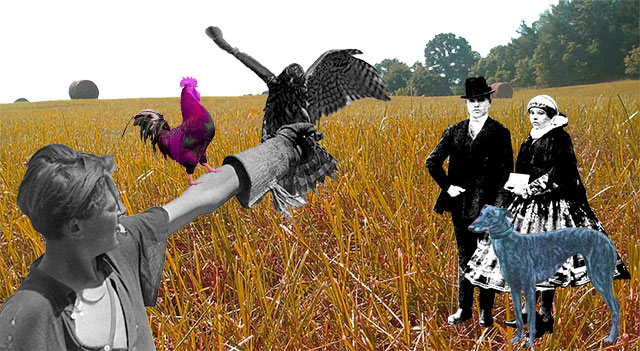
B. LOOK HERE : This is the complete composite you'll be creating in Photoshop.
 |
 |
 |
 |
 |
| IMAGE 1 | IMAGE 2 | IMAGE 3 | IMAGE 4 | Image 5 |
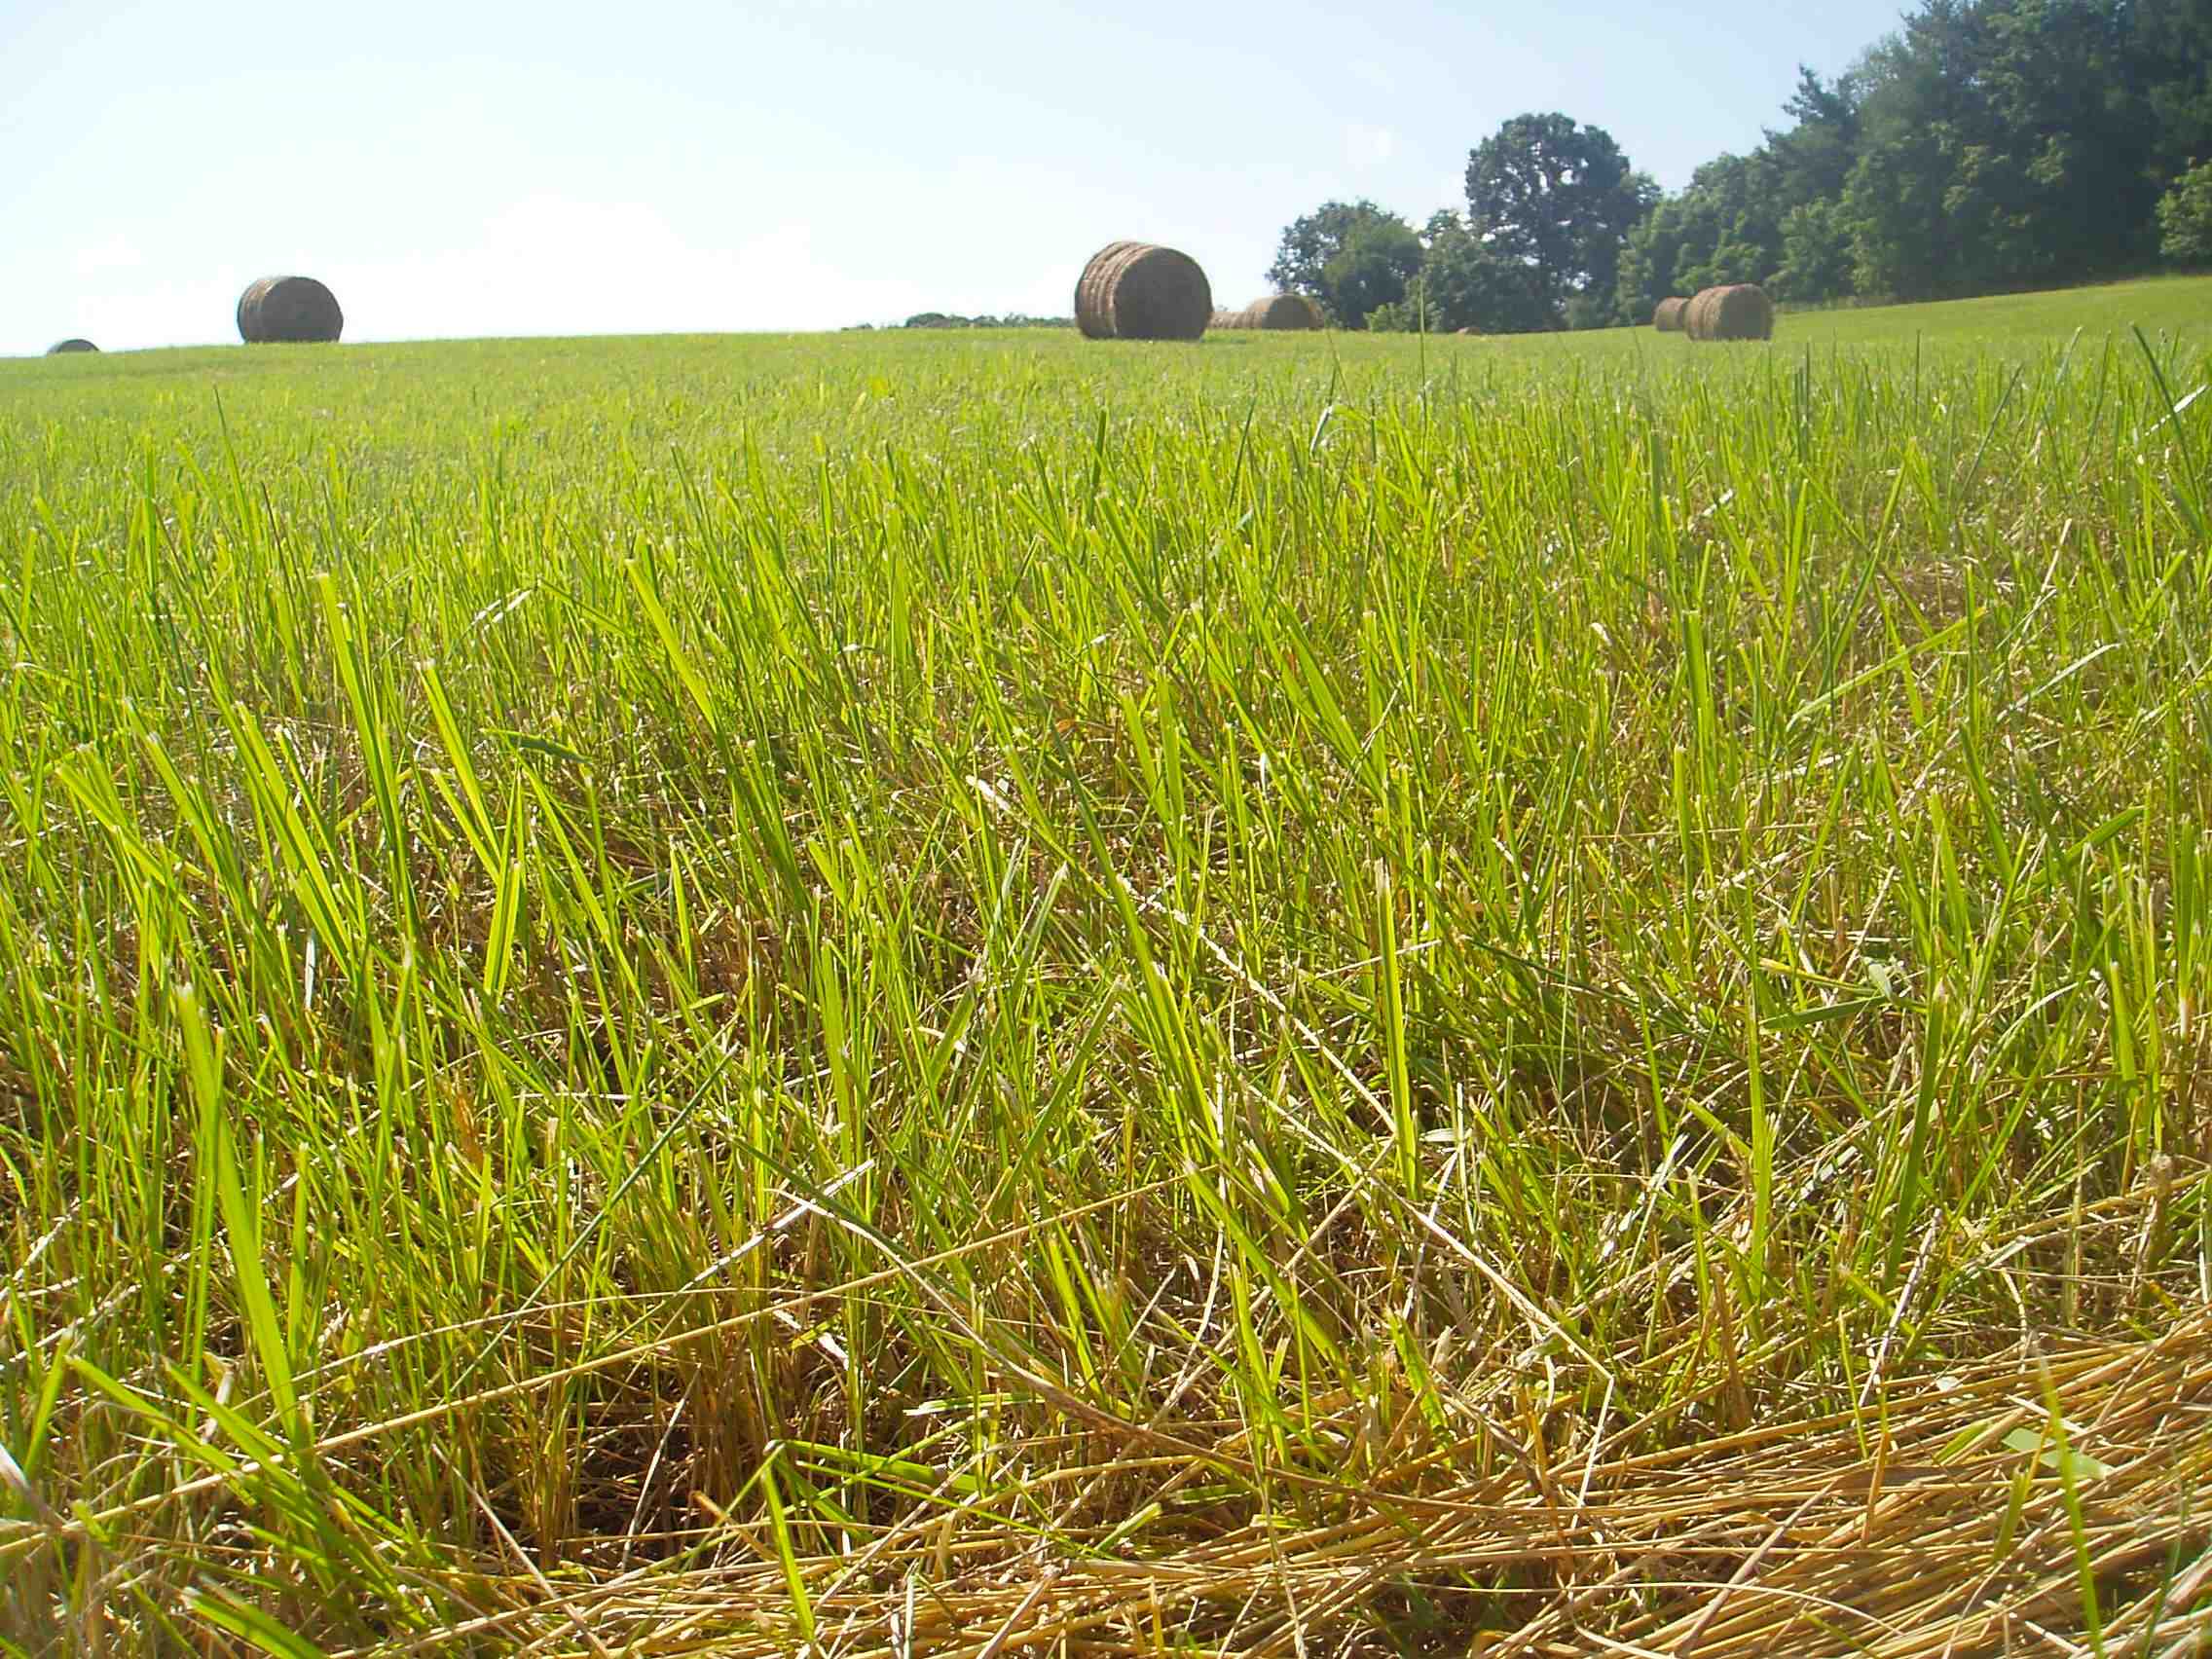
Open Image 1 (Hayfield).
1. Go to the Layer Panel and double click on the "Background" layer--this will UNLOCK this "Background Layer,"
putting Image 1 (hayfield) on Layer 0. Rename this layer "hayfield."
2. Select the Quick Selection Tool and carefully select the sky part of the image
.REMEMBER : Hold down the ALT Key to "minus" parts of the selection. Delete the sky so you'll see a checkerboard.
3. Add an Adjustment Layer (Layer/Adjustment Layer) and adjust the HUE/SATURATION so that the hay turns from green to a yellow-gold color.
4. Crop the hay image so that you lose part of the foreground and change the aspect ratio so it's approximately
2300 X 1200
(refer to the final collage as a visual guide).
5. Save the Photoshop (PSD) file to your desktop as YOUR_NAME.psd
Open up Image 2 (Boy + falcon).
1. Select the Quick Selection Tool and carefully select the boy and the falcon.
REMEMBER : Hold down the ALT Key to "minus" parts of the selection.
Copy (Edit/Copy), and paste (Edit/Paste) and paste this image into the hayfield psd file.
2. Convert the boy + falcon to a Smart Object (Layer/Smart Objects/Convert to Smart Object) and resize (Control "T").
In the Layers Panel, the boy will be on Layer 2 (on top of the hayfield).
3. Rename this layer "boy with falcon."
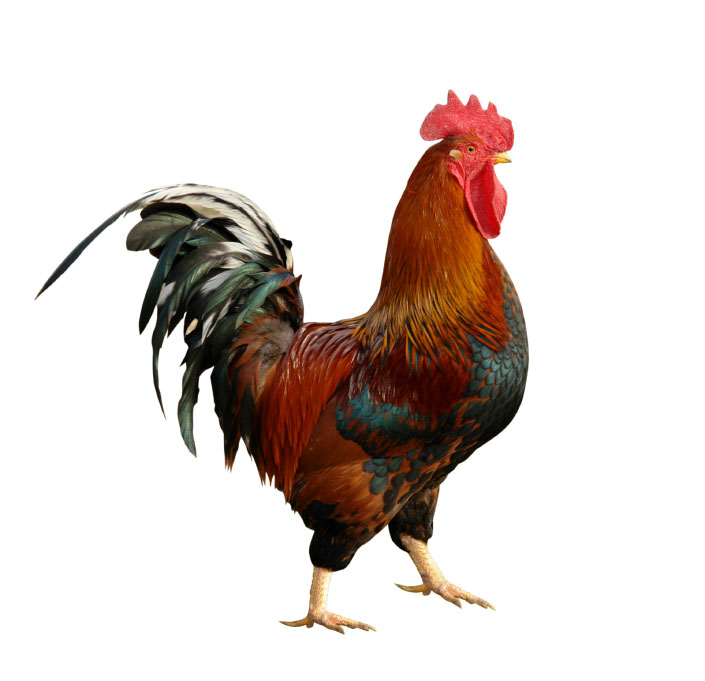
Open up Image 3 (Chicken)
1. Select the Magic Eraser tool and "erase" the white background (the background will now be transparent).
2. Add an Adjustment Layer and change the Hue/Saturation of the chicken so it's bright pink.
In the Layers Panel, highlight ALL the layers in the chicken imagel and merge them (Layers/Merge Layers).
3. Use the Marquee Tool or Command/A ("Select All") to select the entire chicken image.
Copy the chicken (Edit/Copy), and paste the chicken (Edit/Paste) in the "Hayfield" image.
4. Convert the chicken into a Smart Object (Layer/Smart Objects/Convert to Smart Object) and resize (Control "T") and rotate the chicken
so that it is smaller and positioned on the boy's arm. Rename the Chicken layer, "chicken."
5. Save your same PSD file
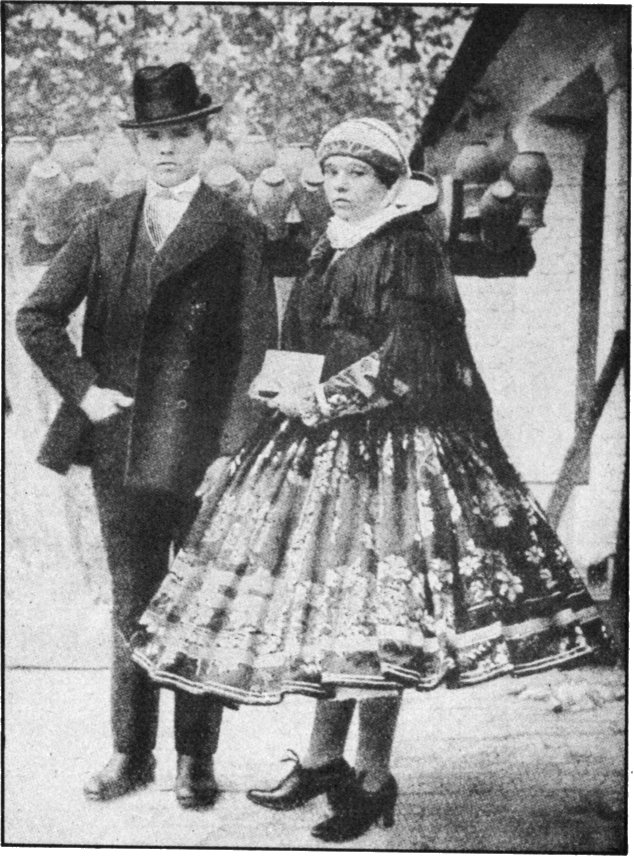
Open up Image 4 (Couple)
1. Use the Pen Tool to create a path around them. Close the path, and in the Paths window, Load the Path as a Selection.
Then Inverse the selection (Select/Inverse) and delete everything
but the couple.
2. Add an Adjustment Layer (Layer/Adjustments/Exposure): brighten up the couple's exposure.
Add a second Adjustment Layer (Layer/Adjustments/Levels) and tweak the greys and whites so that the image
has more contrast and less grey tones.
3. In the Layers Panel, highlight ALL the layers in the couple image and merge them (Layers/Merge Layers).
Copy the couple, paste them into your entire collage.
4. Convert Image 4 to a Smart Object and Rename the layer: "couple." Resize this the couple selection accordingly.
5. Save your same PSD file
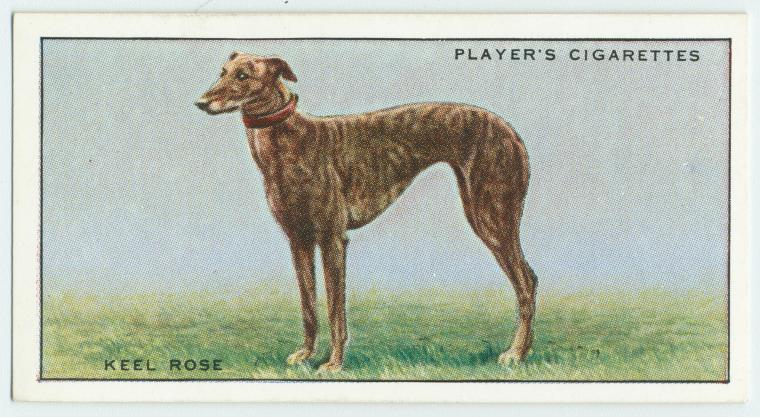
Open up Image 5 (Greyhound).
1. Go to the Layer Panel and double click on the "Background" layer--this will UNLOCK this "Background Layer."
Use the Quick Selection Tool to separate the dog from its background. Then Inverse the selection (Select/Inverse) and delete everything
but the greyhound.
2. Add an Adjustment Layer and change the Hue/Saturation of the greyhound so it's blue.
In the Layers Panel, highlight ALL the layers in the greyhound image and merge them (Layers/Merge Layers).
Copy and Paste the greyhound in the hayfield image. Convert the greyhound to a Smart Object and
Rename the layer: "greyhound." Resize the greyhound according to the visual example.
3. Save your same PSD file
Final Stretch
1. Optimize your final image collage as a JPG (File/Save For Web and Devices) so that your jpg is under 100K.
HINT: This will involve RESIZING the image to approximately 640 X 370
2. Save this jpg image to your desktop as YOUR_NAME.jpg.
3. Save your psd file one more time.
4. UPLOAD your TWO image files (jpg + psd) to your DropBox folder in a folder called MIDTERM and
MAKE SURE YOUR INSTRUCTOR HAS ACCESS TO THEM BEFORE YOU LEAVE THE CLASSROOM.
Your image should look just like this: